Welcome to VANJOIN. Your satisfaction is our biggest pursuit.

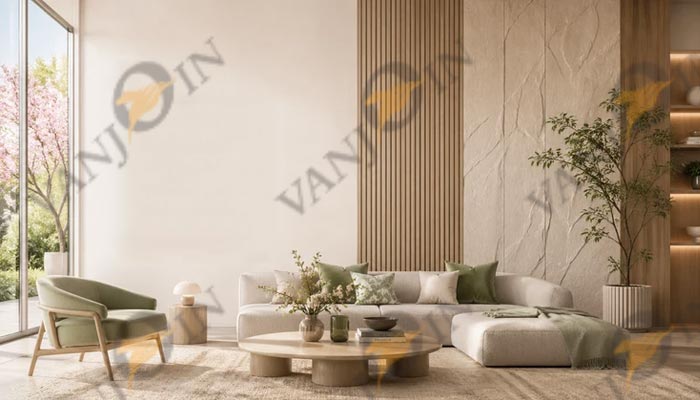
The surfaces that enclose a room dictate its entire atmosphere. Wall cladding is no longer just a background element; it is a defining architectural feature that sets the tone for both residential and commercial spaces.
However, even the most beautiful material is only as good as its installation. Different wall coverings demand highly specific preparation and mounting techniques to ensure longevity, structural integrity, and visual perfection. Understanding these mechanics is crucial for any successful build.
Here is a comprehensive look at how traditional decoration materials are installed, and how modern composite solutions are shifting the industry standard.
I. What are the main wall decoration materials?
Before any traditional material touches a wall, there is a universal rule: the masonry must be perfectly leveled, cleaned, and dried. Once the foundation is prepped, the installation journeys diverge significantly based on the material chosen.
1. Paint and Wall Coverings
Paint remains the most accessible finish, but achieving a flawless look relies heavily on the prep work. Installers must scrape putty over the base wall multiple times to repair unevenness, sanding it perfectly smooth before applying primers and coats of latex.
When it comes to wallpaper, the process introduces immediate texture and warmth. Installers typically apply adhesive directly to the back of the pre-cut paper, allowing it to rest and penetrate before hanging it on the wall. A scraper is then used to carefully work from the center outward to eliminate air bubbles.
2. Wall fabric
There are three types of wall fabrics: fiberglass printed wall coverings, decorative wall coverings and non-woven wall coverings. Its advantages are firmness, breathability, flame retardant, noise reduction and sound absorption.
The disadvantage is that its price is higher than that of wall fabric, and most of them are imported products, which need to be used in conjunction with luxury room decoration to strengthen the artistic taste.
Interestingly, fabric wall coverings require a reversed approach. To prevent moisture from damaging the textile, the adhesive is applied directly to the wall, and the fabric is gently rolled onto the glued surface.
3. Ceramic Tile and Natural Stone
For high-moisture zones like kitchens and bathrooms, ceramics are the undisputed standard. The installation is a classic wet-work process.
A uniform layer of cement mortar is spread over the wall, and additional mortar is applied to the back of each tile before it is pressed firmly into place.
4. Mosaic
Mosaic is the smallest wall decoration material. It is very fashionable, has strong pressure resistance, low water absorption, acid and alkali resistance, impermeability, firm and beautiful quality, and is mostly used for balcony and bathroom decoration.
First of all, first smooth the flatness of the wall, and then use the grout to smooth the wall before laying, and then use the same kind of grout just used to grout the back of the mosaic, and fill the grout as soon as possible. The mosaic is neatly paved in the direction of the trademark arrow and patted with a flat plate.
5. Stone
Natural stone, however, plays by different rules. Stone used as wall decoration materials are mainly divided into two categories: natural and artificial.
The natural veneer stone used for interior wall decoration is marble; the artificial veneer mainly includes artificial marble, prefabricated terrazzo slab, etc. The wall decorated with stone looks elegant and magnificent.
There are three ways to install the stone on the wall. The first is dry hanging, which is fixed on the wall with bolts. Then slot a piece of stone, fix the stone with a T-shaped frame, and then fix the T-shaped frame and bolts together.
The second is wet stickers. First lay a layer of steel mesh on the wall, and then use concrete wet paste.
The third is to paste directly. The direct paste method is not suitable for the bathroom, because the bathroom is mostly light-weight wall, the deformation is large, and the bathroom is often wet, and the glue is easy to age and cause accidents over time. In addition, due to the large deformation of the lightweight wall, if the wall is deformed after gluing, the stone will also change, causing hidden dangers.
6. Solid Wood Veneer
Solid wood wallboard is a new type of decorative wall material developed in recent years, using solid wood as the base material. Solid wood wallboard has the advantages of light weight, fire prevention, moth resistance, simple construction, and generous shape.
To prevent moisture transfer from the masonry—which could warp the wood—installers build a floating framework. Specialized wooden keels are anchored to the wall using stainless steel expansion bolts, typically spaced about 60cm apart.
The wood panels are then securely fastened to this grid, ensuring they remain isolated from potential wall dampness.
A WPC wall panel is a kind mainly made of wood as the basic material, thermoplastic polymer material and processing aids, etc., mixed evenly and then heated and extruded by mold equipment.
High-tech green environmental protection new decorative material, which has both the properties and characteristics of wood and plastic, is a new composite material that can replace wood and plastic.
For different types of WPC wall panels, the installation methods are also different. In general, there are roughly three differences, namely whether a keel is required, whether there is a slot at the splicing, and whether the fixing method is screw or glue. We will focus on the installation methods of different wall panels in the second major point.
8. Fiber Cement Board
Beyond WPC, fiber cement boards represent another pillar of modern commercial installation, cutting labor time by up to 50% compared to traditional brickwork.
Whether used for exterior facades, partition walls, or flooring, the core principle remains consistent: the boards are mounted to a robust steel or stainless-steel keel framework using countersunk tapping screws.
Because fiber cement requires room for structural movement, installers must maintain a 3-5mm expansion seam between boards, which is later filled with silicone sealant or structural mortar to finalize the surface.
II. Different types of WPC wall panels installations
While traditional materials are foundational, their installations often present logistical hurdles on commercial sites. Paint requires absolute wall perfection, tile involves messy wet-work, and stone demands heavy structural reinforcements.
To bypass these bottlenecks, modern developers are turning to WPC (Wood Plastic Composite). WPC offers the aesthetic of real wood with unparalleled moisture resistance and utilizes highly efficient, dry-installation mechanical systems.
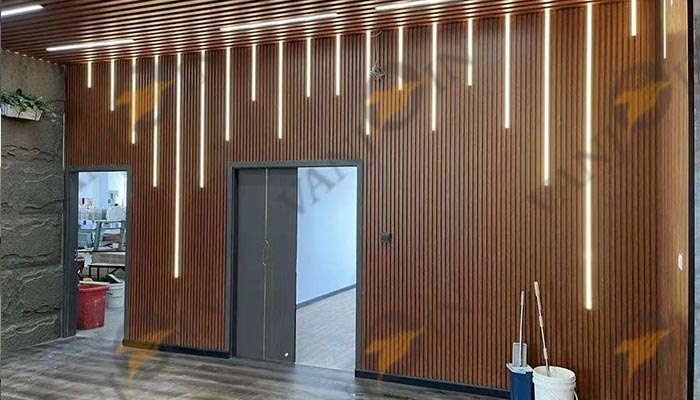
1. Fluted Panels (Great Wall Boards)
For fluted WPC panels, the installation method depends heavily on the profile’s thickness. Lighter profiles (like F50 or F75) can often be mounted directly to a flat wall, whereas thicker models (like F45) require a structural keel system.
Installers weld a steel or wooden frame to the wall, locking the panels onto the keels in sequence. Concealed screws are driven into the hidden grooves, ensuring a hardware-free exterior that is finally capped with matching edge trims.
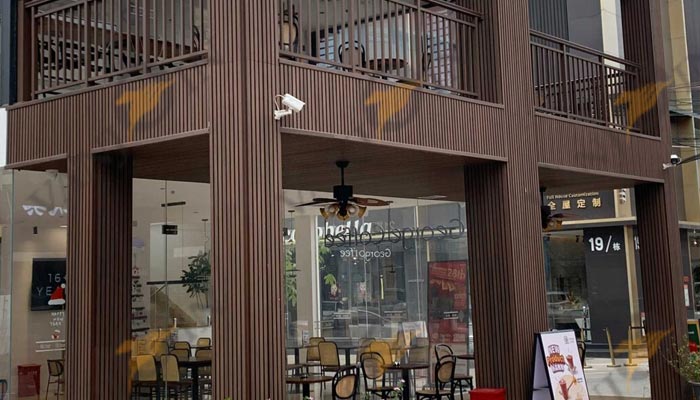
2. WPC Exterior Cladding Panels
The first is to install the keel, choose a wood-plastic keel, drill a hole in the keel and the wall, and then drive in the nails. After the keel is fixed, the wood plastic composite wall cladding can be installed.
The installation of the wood plastic composite wall panel does not require accessories. Yes, you can directly fix the WPC outdoor wall panel with screws, the screw heads will not be exposed after installation, and the appearance will not be affected. The splicing interface is designed with male and female grooves.
It is installed on the female groove with flat head screws. One piece is buckled, and the installation of the exterior WPC wall panel is very convenient. The WPC wall panel design of the male and female grooves can effectively prevent rainwater from infiltrating.
3. WPC Ceiling
Before installing the WPC ceiling panel, first make the hanging bars, fix the upper keel, fix the keel, apply nail-free glue under the keel, and cut the size.
Fasten the edge of the female groove with screws, install the next piece in sequence, close the last piece, and apply some more nail-free glue on the edge, because the last piece of WPC false ceiling cannot be clamped, so simply tap a few points with a straight nail gun.
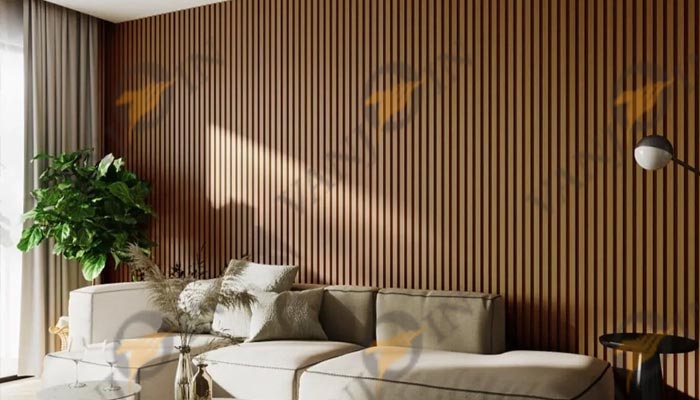
4. WPC Wall Cladding
First, measure the required size of solid wood interior wall panel, then cut the WPC wall cladding with a saw, prepare glass glue and styrofoam glue, put glue on the back of the WPC wall paneling, and spread the glue evenly, then paste the first WPC interior wall panel on the wall, the clip is buckled on the edge of the mother groove, snapped into the clip, fixed with gun nails, and then inserted into the next piece of solid wood wall cladding, fixed with nails, and installed in sequence.
5. Custom Backgrounds and Upholstered Panels
For executive offices or luxury hotel suites, customized background walls often incorporate soft or hard upholstered panels (headboards). Regardless of whether it is a soft bag (fabric over a sponge interlayer) or a hard bag (fabric directly over the base), the installation requires a solid plywood baseboard to be anchored to the wall first, ensuring a rigid foundation for the decorative face.
6. WPC Acoustic Panels and Custom Ceilings
Acoustic panels rely on an intentional air gap to absorb sound waves effectively. Installers space wooden keels across the wall (typically 30-40cm apart) and pack the resulting cavities with sound-absorbing cotton. The WPC acoustic panels are then snapped together via their seam notches and secured with air-gun nails, preventing deformation from thermal expansion.
For overhead applications, the ceiling process starts with hanging ribs and an upper keel structure. Installers apply construction adhesive (nail-free glue) to the bottom of the keels, interlock the ceiling strips via their tongue-and-groove edges, and secure them with screws to create a seamless canopy.

III. Material Showdown: WPC vs. Traditional Options
Why are B2B projects shifting toward WPC cladding? It comes down to a balance of structural resilience and installation efficiency.
WPC vs. Paint & Wallpaper: If a base wall cracks, paint and wallpaper will tear. WPC panels, especially those mounted on keels, completely hide minor wall imperfections. Furthermore, WPC installation is a dry process, releasing zero formaldehyde or volatile odors, allowing for immediate room occupancy.
WPC vs. Tile & Stone: Stone is magnificent but incredibly heavy, requiring slow, expensive dry-hanging masonry. It is also prone to efflorescence (returning to alkali) in damp conditions. WPC is lightweight, installs in a fraction of the time, and provides excellent water resistance without the structural load of masonry.
WPC vs. Solid Wood: Solid wood is highly susceptible to ambient humidity. If the wall is damp, the wood will absorb moisture, leading to warping and joint cracking. WPC is inherently moisture-proof, maintaining perfect dimensional stability regardless of the room’s humidity levels.
IV. Choosing the Right Manufacturing Partner
The global shift towards composite materials has led to a surge in wall panel manufacturing across China. While industry evaluations highlight various top-tier brands dominating the integrated wall sector, international B2B procurement demands a partner that blends innovative R&D with massive supply chain capabilities.
Vanjoin Panel stands at the forefront of this industry. As a premier manufacturer based in Foshan, Guangdong, we specialize in high-grade environmental protection materials, including WPC fluted panels, acoustic solutions, and architectural ceilings.
Unlike standard suppliers, Vanjoin Panel offers a true one-stop solution—from customized R&D and precision manufacturing to global logistics and installation guidance. By mastering the core extrusion technologies of composite materials, we provide contractors with cladding solutions that guarantee both aesthetic brilliance and decades of structural performance.
Have questions about specifying the right installation method for your next project? Our technical team is available 24/7. Contact Vanjoin Panel today for expert consultation, material samples, and competitive B2B wholesale pricing.
FAQ
Can WPC wall panels be installed over uneven walls?
Yes. Unlike paint or wallpaper that demand perfectly flat and repaired surfaces, WPC panels are frequently mounted on a structural keel system. This framework effectively bypasses and hides minor wall imperfections, significantly reducing prep time and labor costs.
What is the main difference between WPC and solid wood installation?
Both often utilize keel frameworks, but the critical difference lies in moisture handling. Solid wood is highly susceptible to ambient humidity and can warp or shrink over time. WPC (Wood Plastic Composite) is inherently 100% waterproof, meaning it maintains perfect dimensional stability and will not rot or crack, making the installation much more resilient in damp environments.
How is exterior WPC cladding installed to prevent water damage?
Exterior WPC cladding utilizes a precise male-and-female tongue-and-groove design. The panels are interlocked and secured to a weather-resistant keel framework using screws driven directly through the female groove. This concealed mechanical fastening creates a seamless, watertight barrier against rainwater infiltration.
Do acoustic wall panels require a special installation method?
Yes, acoustic panels require an intentional air gap to absorb sound waves effectively. Installers must mount wooden keels spaced 30-40cm apart on the wall, pack the resulting cavities with sound-absorbing cotton, and then secure the WPC acoustic panels over the top.
Why is natural stone installed differently than ceramic tiles?
Due to its immense weight, large natural stone slabs cannot rely on cement mortar or standard adhesives like ceramic tiles do. Stone requires a “dry hanging” method where stainless steel T-frames and expansion bolts mechanically anchor the heavy slabs directly into the masonry, preventing the long-term degradation associated with heavy-duty adhesives.
+86(0)27 82801003


Add:Floor 14, Golden Block, Poly Champagne International Building, Hanxi No.1 Road, Qiaokou District, Wuhan City, Hubei Province, 430034 China
Got a question, comment or business enquiry? We are always happy to hear from you.